
TL;DR
A closet rig can be a surprisingly good recording space when you focus on placement and treating reflections, not just soundproofing. Moving equipment away from you, sealing gaps, and managing low frequencies make a big difference.
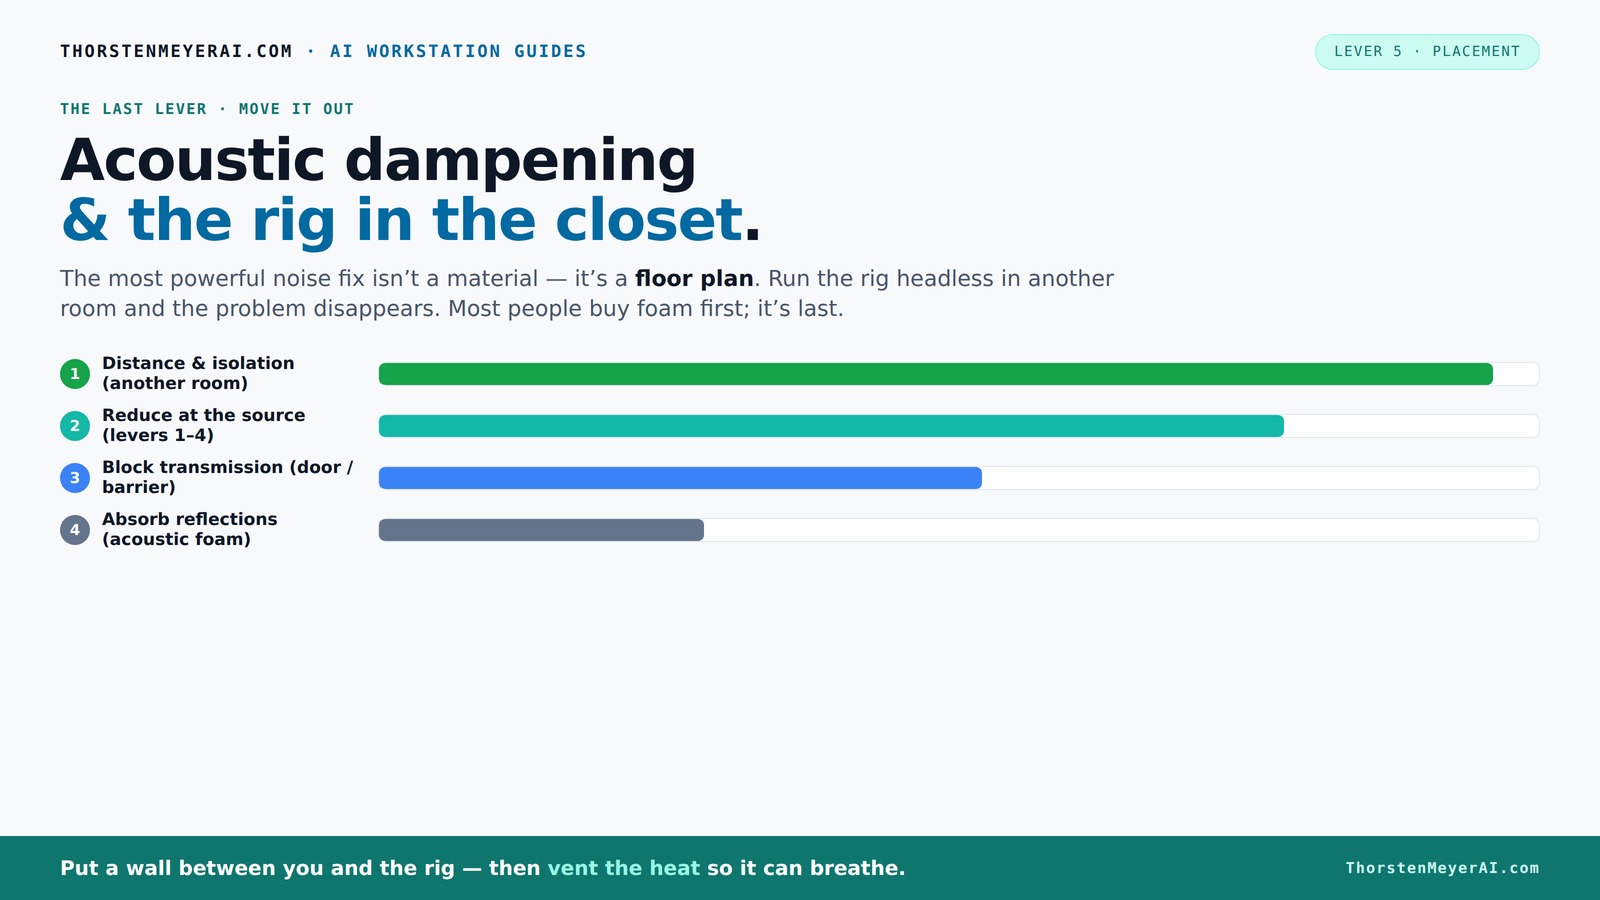
Acoustic dampening
& the rig in the closet.
The most powerful noise fix isn’t a material — it’s a floor plan. A rig you can’t hear because it’s in another room beats any amount of foam. Tap the approaches in Part 1 to see what actually works.
(another room)
(levers 1–4)
(door / barrier)
(acoustic foam)
Contain the noise, not the heat
Key Takeaways
- Prioritize distance and isolation over expensive foam treatments — moving the rig out of your space is the biggest win. Learn more about effective room setup at room acoustics tips.
- Treat reflection points around the room, not just corners, with dense, layered absorbers for a natural, controlled sound.
- Seal gaps around the door and treat hard surfaces like desks and walls with blankets or foam to minimize leaks and unwanted echoes.
- Use thick, layered acoustic materials instead of relying solely on lightweight foam for better low-frequency control.
- Ensure proper ventilation when placing a rig in a closet to prevent heat buildup, using active airflow and ducting if needed.
acoustic foam panels for home studio
As an affiliate, we earn on qualifying purchases.
As an affiliate, we earn on qualifying purchases.
Why Most Closet 'Soundproofing' Misses the Mark
Soundproofing in a closet is often misunderstood. It’s not just about blocking sound with foam or heavy barriers. True soundproofing involves sealing gaps, adding mass, and addressing the door and windows. Foam alone doesn’t stop noise from leaking out or in; it softens reflections inside, but that’s not enough.
For example, sealing a closet door with weatherstripping or acoustic sealant can reduce leakage by up to 50%. Combining this with layered, dense treatment inside turns a noisy closet into a quiet booth. Remember, the goal isn’t silence — it’s controlled sound and minimized reflections.
soundproofing door seal kit
As an affiliate, we earn on qualifying purchases.
As an affiliate, we earn on qualifying purchases.
How to Position Your Microphone for Crystal Clear Sound in a Tiny Room
Placement is king in a small closet. Your mic’s position relative to reflective surfaces can make or break your sound. For detailed microphone placement strategies, visit microphone placement tips. Start by placing the mic at least 6–12 inches away from the wall behind it to reduce reflected sound pickup. Facing into the room reduces early reflections bouncing off the closet door or walls.
Imagine you’re recording vocals in a closet: position the mic 8 inches in front of you, slightly above mouth level, facing your mouth. Use a portable reflection filter or a thick blanket behind it to catch stray reflections. This simple move can cut reverb and echo by half.
In a tiny space, small adjustments matter more than you think. Test different angles and distances to find the sweet spot that minimizes room sound.
studio monitor isolation pads
As an affiliate, we earn on qualifying purchases.
As an affiliate, we earn on qualifying purchases.
Treat the Whole Room, Not Just the Corners: Why Coverage Matters
In a tiny closet, relying only on corner traps is like putting a Band-Aid on a leak. Instead, aim to treat the entire space — walls, ceiling, and even the desk surface. Thick, broad panels or blankets on the walls absorb more of the troublesome mid and low frequencies that cause boomy, boxy sounds.
Understanding why full-room coverage matters helps you make smarter treatment choices. When you treat only the corners, you address some bass buildup, but you leave many reflective surfaces untreated, which continue to bounce sound around. This can cause uneven frequency response, making your recordings sound unnatural or muffled. Covering more surfaces ensures sound waves are absorbed or diffused before they can reflect back into the microphone, resulting in clearer recordings. Think of your closet as a mini concert hall — you want to tame every surface that reflects sound.
portable sound absorption panels
As an affiliate, we earn on qualifying purchases.
As an affiliate, we earn on qualifying purchases.
Seal the Door and Hard Surfaces — Don’t Overlook the Weak Spots
The door is usually the weakest link in a closet setup. Air gaps, hinges, and unsealed edges let sound leak and reflections bounce around. Sealing gaps with weatherstripping, acoustic sealant, or hanging a thick blanket can cut leakage significantly. Find more about sealing techniques at soundproofing methods.
For instance, hanging a moving blanket over the door or attaching draft stoppers around the frame reduces sound escape. Also, treat nearby hard surfaces — a stiff blanket or foam on the desk surface can absorb reflections that make your recordings sound boomy or hollow.
Think of it like patching holes in a boat — every gap sealed makes your space more controlled and less echoey.
Layered, Dense Absorbers Work Better Than Cheap Foam Alone
In a small closet, the goal is to absorb as much sound energy as possible, especially at lower frequencies. Thick, layered materials like fiberglass panels, dense blankets, or mineral wool outperform thin foam by a mile. For more on acoustic materials, check out acoustic treatment options.
For example, using 4-inch thick bass traps in corners and covering walls with layered acoustic panels can reduce low-frequency boom. Combining foam with heavier absorbers helps tame both the high and low ends, preventing that ‘boxy’ sound.
Many DIYers swear by stacking blankets or using multiple layers of foam for maximum absorption. The key is material density, not just surface area.
Understanding why layered treatment works so well hinges on the physics of sound absorption. Thicker, denser materials have more mass to convert sound energy into heat, especially at lower frequencies where thinner foam struggles. This means better bass control and a more natural, balanced sound. While foam is useful, relying solely on it can leave your low end boomy and uncontrolled. Layered absorbers fill in those gaps, balancing your room acoustics effectively.
Keep Your Rig Cool and Safe in a Closet — Ventilation Is Key
Putting a high-powered rig in a closet is smart for noise, but dangerous for heat. An enclosed space traps heat, risking overheating and throttling. The fix? Good airflow and active ventilation.
Install a small exhaust fan or use a vented enclosure to let hot air escape. This keeps temperatures in check and prevents fans from roaring because of heat buildup. You can even use a ducted system to direct heat outside the closet, as some custom soundproof cabinets do.
For example, a 600W GPU running in a sealed closet without airflow can reach 85°C in under an hour. With a vent or ducted exhaust, temperatures stay below 70°C, keeping your rig happy and quiet.
Understanding why proper ventilation matters is crucial. Overheating not only risks hardware failure but can also cause your cooling fans to run at higher speeds, introducing noise back into your recording environment. Active airflow solutions, like small inline fans or ducting, are essential investments. They ensure your equipment runs efficiently and quietly, maintaining the integrity of your recordings and hardware longevity.
Frequently Asked Questions
Can a closet really work for professional vocals or podcasts?
Yes, a well-treated closet can produce high-quality recordings. Focus on controlling reflections, sealing gaps, and proper mic placement. It’s about making the space work for your sound, not just trying to hide noise.
What’s the difference between soundproofing and acoustic treatment?
Soundproofing blocks sound from leaving or entering a space—think sealing gaps and adding mass. Acoustic treatment reduces echoes, reflections, and reverb inside the room—think foam panels and blankets. Both are important, but they serve different goals.
Where should I position the microphone in a tiny closet?
Place the mic about 6-12 inches away from your mouth, facing into the room. Avoid placing it directly against the wall behind you. Use a reflection filter or a blanket behind the mic to reduce room sound and improve clarity.
Should I treat corners or walls first?
In a small closet, treat the entire space rather than obsessing over corners. Cover walls, ceiling, and reflective surfaces with dense absorption. This broader approach reduces standing waves and low-end booms more effectively.
How thick should acoustic panels or blankets be?
For small closets, 2-inch thick panels are usually enough. For better low-frequency absorption, opt for 4-inch panels. Thicker materials absorb lower frequencies more effectively, preventing that boxy sound.